With the recent food shortages due to the current COVID-19 pandemic some of us werent prepared. But what if you could make your own long-life homemade MREs survival food? Lets dig in!
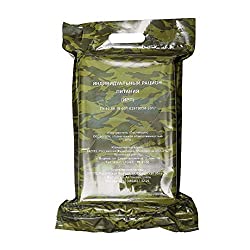
Meals Ready to Eat – also known as MREs – have been a staple of the military diet for decades. They’ve always been used by the military, and now they’re getting some recognition in the survival world too. The problem is that they can be a bit expensive to purchase. They also don’t taste all that good, sadly.
Given that being a survivalist is about doing things for yourself, why not make your own MREs at home? That way you can make your own, make them delicious, and save a lot of money in the process. It also helps to know how to make your own in the event that things hit the fan and buying them is no longer an option.
Important Considerations When Making Homemade MREs
There are some things to keep in mind when making homemade MREs. The first is that you need to use nutrient-dense, high calorie foods in the MRE. Depending on how long you might need to survive on these meals, you could be left rationing them. You could have to eat just one meal a day to make them last for as long as possible. That means each homemade MRE needs to have your basic caloric requirements. They should be at least 1,200 calories so you get all the calories you need to survive on one meal per day.
Another important consideration is the weight and mass of your homemade MRE. You need to have them fit neatly into your bug-out bag so that you can carry them with you, along with the other important necessities. You also want to make sure that the homemade survival food you make has a long shelf-life. The shorter the shelf life of your food, the more often you need to replace it. It’s good to have a well-stocked survival pantry, but what good is all that homemade survival food if it spoils within half a year and you need to survive for two years?
Consider all the things you need for a full meal and pack it into the MRE. That may mean putting single-serving instant coffee into a breakfast MRE or a single-serving Gatorade packet into a regular meal MRE. You can also include individual water packets, which are available to purchase at most survival goods stores.
What you Need to Make MREs at Home

Today we’ll be looking at how to make your own homemade survival food in a vacuum sealer. Vacuum sealers are the best way to ensure your MRE has a long shelf life. We’d recommend that you pick up a vacuum sealer if you don’t have one yet. You can also get pre-vacuum packed food and include it in your homemade MRE if you want.
1. Dehydrator

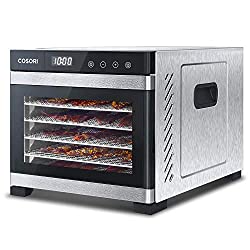
The dehydrator is one of the most important parts of making homemade MREs. Take care to shop around and find the right one for you. The heat distribution and airflow is one of the most important factors to consider, outside of the size and price.
Food dehydration by itself is a simple enough concept. Keep food at a certain temperature for a certain amount of time to dry the moisture out of the food. The challenge comes from ensuring that the heat is evenly distributed. Given that certain foods need to be dehydrated at a certain distance, you want a dehydrator that offers good airflow. Check out reviews and manufacturer’s guidelines for any dehydrator you consider to make sure you get a good deal on a good dehydrator.
2. Mylar Bags
Mylar bags have revolutionized long-term food storage. When storing food for long periods of time it is most vulnerable to heat, light, oxygen, moisture, and rodents. Mylar bags can help in all of those areas. Keep in mind though that they aren’t a suitable replacement for proper food storage containers like storage buckets. However, they can help to keep your homemade survival food safe for years to come when used with a vacuum sealer. Speaking of which;
3. Vacuum Sealer
The reason that you throw food out is because it gets contaminated by bacteria and other microorganisms and becomes inedible. One option to preserve food is by freezing it, but that’s not always possible with survival situations. Instead of being frozen, MREs are vacuum sealed for freshness and to preserve them. If you want to make your ow homemade MREs at home, you’re going to need a vacuum sealer. The good news is that they are fairly cheap to buy. Not to mention they pay for themselves in savings on store-bought Meals Ready to Eat!
4. Desiccant
Desiccants such as silica gel (those little packets in jerky) are useful because they absorb moisture and oxygen to further prevent food spoilage. A good silica packet can absorb up to 40% of its weight in moisture. So get some desiccants to keep your homemade MREs fresher for longer.
Best Foods to Use For Homemade Mres

Now that you know what you need to make your homemade survival food lets take a look at the best long-life foods to include.
Best Breakfast Foods for MREs
- Dried Rolled Oats
- Dehydated Fruit (Bananas, Apple, Apricot ect.)
- Cinnamon
- Milk Powder
Best Main Meal Foods for Mres
- Freeze Dried Meat (Chicken,Beef,Pork)
- Powdered Potato
- Dehydated Vegetables
- Powdered Eggs
- Couscous
- Dried powdered Tomatoe (Soup)
Most MREs are edible straight from the bag. However, some do require heating and this style will require rehydration.
MRE Recipe 1: Cheesy Spaghetti
Cheesy spaghetti is a staple in most households and it makes for a great MRE too. The spaghetti is packed full of energy and carbs, while the cheese has a lot of protein in it. Both of these foods are also bulky and have a lot of calorie sin them, which is essential for a good MRE.
Ingredients
- MRE Spaghetti with meat sauce
- MRE cheese spread
Instructions
Heat the spaghetti and the cheese spread in the same stove for ten minutes. Mix them together in your main meal pouch and add sauce or seasonings as needed. It’s as simple as that.
MRE Recipe 2: Field Birthday Cake
Just because you are in the middle of a survival situation doesn’t mean you can’t enjoy a nice birthday cake. You should get something on your birthday, even a simple MRE birthday cake. Here’s how to make your own field birthday cake for on-the-go celebrations.
Ingredients
- MRE pound cake
- MRE crackers
- A Pack of dairy creamer
- A pack of MRE sugar
- A pack of cocoa mix
- A canteen of water and a spoon for mixing
- Matches
Instructions
Combine the cocoa powder, dairy creamer, and sugar with some water in a clean canteen cup. Add the powders as necessary to make icing thick or thin, depending on your preferences. Mix everything together.
Take the pound cake and add the icing to it. Serve the cake on a plate of crackers so that nothing drips off. Add some matches to the top of the cake to serve as emergency field candles, and have yourself a little birthday celebration.
Conclusion
Knowing how to make your own homemade MREs at home can help in survival situations. It’s good to know how to make them if you find yourself in a situation where you can’t buy them.
Ones you make at home are also likely going to taste better and last longer than the ones you can purchase from the store.
Get yourself a good dehydrator, a vacuum sealer, and some Mylar bags and you’ll be good and ready to survive anything that comes your way. At the very least you’ll have all the food you need.
